A home can feel messy even when you clean it regularly. Everyday items pile up on counters, clothes take over drawers, and small belongings seem to end up everywhere. The good news is that you do not need to buy expensive storage products or spend an entire weekend reorganizing your home.
A few simple changes can make your rooms look tidier and help you find things more easily. These 35 organization hacks cover different areas of your home, from the kitchen and bedroom to the bathroom and living room.
1. Use Baskets to Group Similar Items
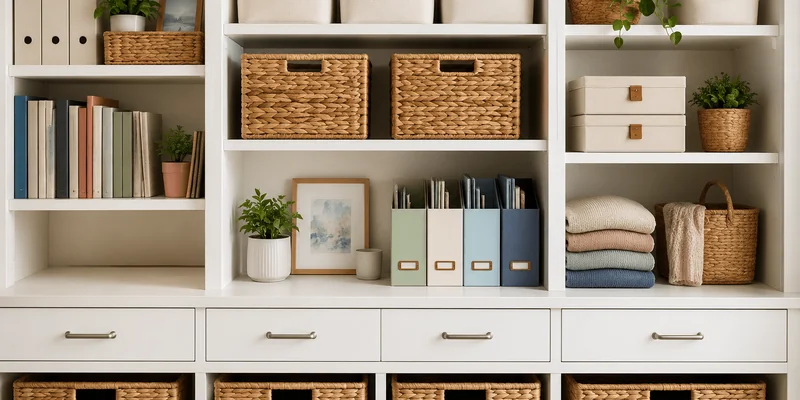
Baskets make it easier to keep similar items together instead of spreading them across different surfaces. You can use them for blankets, toys, magazines, toiletries, and other everyday belongings.
Place baskets on shelves, inside cabinets, or beside furniture. Choose sizes that fit your available space, and give each basket a clear purpose so items do not get mixed together.
2. Add Drawer Organizers
Small items often turn drawers into cluttered spaces. Drawer organizers create separate sections for different belongings, making everything easier to find.
Use them in kitchen drawers for utensils, in bedroom drawers for accessories, and in bathroom drawers for personal care products. You can also use adjustable dividers to fit drawers of different sizes.
3. Use Vertical Space for Storage
When cabinets and floor space are limited, look at your walls. Shelves, wall-mounted racks, and hanging organizers provide extra storage without taking up much room.
You can install shelves above a desk, use wall racks for kitchen utensils, or add floating shelves in the bathroom. Keep frequently used items within easy reach and place less-used belongings on higher shelves.
4. Create a Drop Zone Near the Entrance
Keys, wallets, sunglasses, and bags often end up on the nearest table or chair. A dedicated drop zone near the entrance gives these items a regular place.
Use a small tray, wall hooks, or a narrow shelf near the door. Place your everyday essentials there when you return home. This simple habit also makes it easier to find everything when you need to leave.
5. Label Storage Containers
Labels help everyone in the household know where items belong. They are especially useful when you store similar-looking products in opaque boxes or multiple containers.
Label bins for seasonal clothing, cleaning supplies, craft materials, or pantry items. Keep the labels short and clear. This makes it easier to return things to their proper places instead of leaving them on counters.
6. Declutter Kitchen Countertops
Kitchen counters can quickly fill up with appliances, utensils, jars, and other everyday items. Too many objects make the kitchen feel crowded and leave less room for food preparation.
Keep frequently used appliances and essential items on the counter. Store less-used equipment inside cabinets and put away items after cooking. Leaving some open space can make the entire kitchen feel cleaner.
7. Store Food in Clear Containers
Clear containers make it easier to see how much food you have left. They also help keep pantry shelves neat when you use containers of similar shapes and sizes.
Transfer suitable dry foods, such as rice, pasta, flour, and cereal, into airtight containers. Label them when needed, and check that each container is clean and completely dry before adding food.
8. Use Lazy Susans in Cabinets
A lazy Susan is a rotating tray that lets you reach items without moving everything around. It works particularly well in deep cabinets and crowded shelves.
Place one in a kitchen cabinet for spices, sauces, or condiments. You can also use one under the bathroom sink for skincare products. Group similar items together so you can find what you need with a quick turn.
9. Organize the Refrigerator by Category
A refrigerator is easier to manage when similar foods have designated places. Without a system, leftovers can get pushed to the back, and fresh ingredients may go unnoticed.
Keep drinks together, store leftovers in a specific area, and group similar ingredients where practical. Use clear containers for prepared food and label leftovers with dates. Follow your refrigerator’s temperature and food-storage guidance to keep food safe.
10. Hang Mugs and Cooking Utensils
Mugs and cooking utensils can take up a lot of cabinet and drawer space. Hooks offer another way to store them while keeping frequently used items accessible.
Install suitable hooks under a cabinet for mugs or use a wall-mounted rail for spatulas and ladles. Make sure the hooks are securely fitted and positioned away from cooking hazards. Avoid hanging too many items in one spot, as this can make the area look crowded.
11. Use Shelf Risers
Shelf risers create an extra level inside cabinets and cupboards. They help you use the full height of a shelf instead of stacking everything on top of one another.
In the kitchen, use them for plates, cups, and small bowls. In the bathroom, they can hold folded washcloths or toiletries. Choose risers that fit the shelf and can support the weight of the items you plan to store.
12. Arrange Clothes by Category
A wardrobe becomes easier to use when similar clothing items are stored together. Instead of mixing everything, create separate sections for shirts, trousers, jackets, and other clothing.
You can also group clothes by color within each category if that helps you find specific items. Keep the arrangement simple enough to maintain. A clear system saves time when getting dressed and makes it easier to notice clothes you rarely wear.
13. Use Matching Hangers
Different types of hangers can make a wardrobe look uneven and take up unnecessary space. Matching hangers create a more uniform appearance and help clothes hang neatly.
Choose slim hangers if your closet has limited space. Use sturdy hangers for heavier coats and jackets, and select suitable hangers for delicate clothing. Remove empty hangers when you take clothes out so they do not crowd the rail.
14. Fold Clothes Vertically
Traditional folding often creates tall stacks that hide the clothes underneath. Vertical folding allows you to see more items at once.
Fold T-shirts, pajamas, and other suitable clothing into compact shapes, then place them upright in drawers. Use drawer dividers to keep the folded clothes in position. This method works particularly well when you have limited drawer space.
15. Store Seasonal Clothes Separately
Keeping every item of clothing in your everyday wardrobe can make it difficult to find what you need. Storing seasonal clothes separately frees up space for the items you currently use.
Place out-of-season clothing in clean storage bins, under-bed containers, or suitable vacuum bags. Wash and dry clothes before storing them, and keep them in a cool, dry place. Label each container so you can identify its contents later.
16. Add Hooks Behind Doors
The backs of doors often provide useful storage space that goes unused. Over-the-door hooks can hold items without requiring holes in the wall.
Use them for towels, robes, jackets, bags, or frequently worn clothing. Check that the hooks fit the door properly and do not prevent it from closing. Keep heavier items on hooks designed to support their weight.
17. Use Drawer Dividers for Socks and Accessories
Socks, belts, scarves, and small accessories can become tangled when stored together. Drawer dividers create separate compartments and make these items easier to find.
Assign one section to each category. Roll or fold socks in pairs, and keep small accessories in suitable compartments. You can also use small boxes you already have if you do not want to buy special organizers.
18. Organize Shoes in One Dedicated Area
Shoes scattered near the entrance or across the bedroom can make a room look untidy. A dedicated shoe area keeps them together and prevents them from spreading across the floor.
Use a shoe rack, a cabinet, or stackable shoe organizers. Keep frequently worn pairs near the entrance and store occasional footwear elsewhere. Clean muddy shoes before putting them away, and allow damp footwear to dry properly.
19. Use Trays on Bathroom Counters
Bathroom counters often collect soap, skincare products, toothbrush holders, and other small items. A tray groups these belongings into one area and makes the counter easier to clean.
Place daily essentials on a small, water-resistant tray. Store products you rarely use inside a cabinet or drawer. Choose a tray that fits the counter without taking up too much space, and wipe it regularly to prevent moisture buildup.
20. Organize Toiletries in Small Bins
Toiletries can become difficult to manage when they are mixed together in cabinets or drawers. Small bins help separate products by purpose.
Use one bin for hair care, another for skincare, and a third for grooming supplies. Keep frequently used products near the front and less-used items farther back. Check expiration dates and remove empty containers to prevent unnecessary clutter.
21. Use Tension Rods Under the Sink
The space under a kitchen or bathroom sink can be awkward because of the plumbing. A tension rod can create extra hanging space without requiring permanent installation.
Fit a suitable rod across the cabinet and hang compatible spray bottles by their trigger handles. Keep the floor space underneath available for other supplies. Check the rod’s weight limit and make sure it is secure before adding products.
22. Hang Towels Neatly
Towels left on counters, beds, or the backs of furniture can make a room feel messy. Designated towel bars, hooks, or racks give them a regular place.
Install towel holders near the shower or sink where they are convenient to use. Spread damp towels out so they can dry properly, and store clean towels in a separate cabinet or basket. This keeps bathroom surfaces clearer and helps prevent musty smells.
23. Give Every Cleaning Supply a Home
Cleaning products are easier to manage when they are stored in one designated area. Scattered bottles and cloths can create clutter in kitchens, bathrooms, and laundry rooms.
Use a caddy for frequently used supplies or arrange products in a cabinet with separate sections. Keep cloths, brushes, and sponges together, and return everything after cleaning. Store chemicals according to their labels and keep them away from children and pets.
24. Use a Laundry Sorting System
Laundry becomes easier to handle when dirty clothes are sorted before washing. Instead of creating one large pile, use separate sections for different loads.
You can use a divided hamper for lights and darks or keep a separate basket for towels. Choose a system that matches your laundry routine rather than creating too many categories. Empty the hampers regularly so clothes do not spill onto the floor.
25. Hide Cables With Simple Organizers
Loose cables around desks, televisions, and charging areas can make otherwise tidy spaces look cluttered. Cable clips, ties, and sleeves help keep wires grouped together.
Bundle cables that belong to the same device and use clips to guide them along the back of a desk or entertainment unit. Keep plugs accessible and avoid tightly bending wires. Do not bundle cables in a way that traps heat or damages their insulation.
26. Create a Dedicated Charging Station
Chargers and electronic devices often end up scattered across different rooms. A charging station gives them one regular place and helps keep cables organized.
Choose a shelf, desk corner, or small tray near a suitable power outlet. Use cable clips to keep charging leads in position, and return devices to the station when they are not in use. Keep the area dry and avoid overloading power outlets.
27. Organize Paperwork With File Folders
Bills, receipts, warranties, and important documents can quickly fill drawers and countertops. File folders provide a simple way to keep paperwork organized and easy to find.
Create separate folders for financial documents, household bills, warranties, and personal records. Label each folder clearly and place it in one designated drawer or cabinet. Review the papers occasionally and dispose of unneeded documents securely.
28. Use Desk Organizers for Small Supplies
Pens, notebooks, sticky notes, chargers, and other work supplies can crowd a desk. Organizers help keep these items within reach without covering the entire work surface.
Use a pen holder for writing tools and a small tray for frequently used accessories. Store spare supplies in a drawer or box. Keep only the items you need for regular tasks on the desk so you have enough space to work comfortably.
29. Keep Remote Controls in One Place
Remote controls often disappear between sofa cushions or end up on different tables. Giving them a fixed place makes them easier to find.
Use a small tray on the coffee table or a remote-control holder beside the sofa. Keep the remotes for your television and other devices together. Return them to the same spot after use to avoid searching for them later.
30. Use Furniture With Built-In Storage
Furniture with built-in storage can help reduce clutter, particularly in smaller homes. It provides space for everyday belongings without requiring additional cabinets or shelves.
Consider a storage ottoman for blankets, a bench with a compartment for shoes, or a bed with drawers underneath. Choose furniture that suits your room and provides storage for items you actually use. Avoid filling every compartment with things you no longer need.
31. Keep Coffee Tables Mostly Clear
Coffee tables often become temporary storage for cups, mail, books, chargers, and other belongings. When too many items collect on the surface, the living room can feel crowded.
Keep a few useful or decorative items on the table, such as a small tray or a book. Move everything else to its proper place. If you use the table regularly for meals or activities, leave enough open space for those tasks.
32. Make Use of Under-Bed Storage
The space beneath a bed can hold items that you do not need every day. Using it well can free up wardrobe shelves and bedroom cabinets.
Store extra bedding, seasonal clothing, or occasional-use shoes in flat containers that fit under the bed. Choose covered containers to protect belongings from dust. Label them so you can identify their contents without pulling everything out.
33. Rotate Toys and Children’s Items
When every toy is available at once, play areas can become difficult to organize. Keeping a smaller selection accessible can make cleanup easier and reduce the amount of clutter on the floor.
Store some toys in labeled bins or closed containers, then rotate them every few weeks. Keep frequently used toys within reach and group similar items together. Make sure storage is safe for children and that small parts are kept away from young children who may swallow them.
34. Follow the One-Minute Rule
Small tasks often create clutter when they are repeatedly postponed. The one-minute rule encourages you to handle simple tasks immediately when they take very little time.
For example, hang up a jacket, return a mug to the kitchen, put shoes on the rack, or throw away an empty package. These small actions prevent everyday mess from building up. If a task requires more time or attention, add it to your regular cleaning routine instead.
35. Reset Each Room Before Bed
A short evening reset helps keep your home organized without requiring a long cleaning session every day. The goal is to return commonly used items to their places before you finish the day.
Spend a few minutes clearing surfaces, folding blankets, putting away clothes, and returning remote controls or chargers to their designated spots. You can focus on one room at a time or move through the main living areas. A consistent routine makes it easier to start the next day with a tidier home.
Final Words
Making your home feel organized does not require a complete makeover or a large collection of storage products. Simple changes, such as using drawer dividers, creating dedicated storage areas, and keeping counters clear, can make everyday tasks easier.
Start with the rooms where clutter builds up most often, then introduce a few hacks at a time. Also, build small habits into your daily routine so your home stays organized without requiring constant effort.
People Also Ask
1. How can I organize my home quickly?
Start by putting away items that are out of place and clearing cluttered surfaces. Use baskets and storage containers to group similar belongings.
2. How can I keep my home organized every day?
Return items to their designated places after using them. Spend a few minutes each day tidying up the main living areas.
3. What is the easiest way to organize a small home?
Make use of vertical space, under-bed storage, and furniture with built-in compartments. Keep only the items you need regularly within easy reach.
4. How can I organize my home without buying storage products?
Reuse boxes, jars, baskets, and containers you already have. You can also declutter drawers and rearrange shelves to make better use of existing space.
5. Which room should I organize first?
Start with the room where clutter affects your daily routine the most. Focus on one small area at a time to make the task easier to manage.