Author: CleanHome

  • House Organization: 25 Practical Ideas for a Tidier Home

    House Organization: 25 Practical Ideas for a Tidier Home

    Keeping your home organized can make everyday tasks easier and help you maintain a cleaner living space. However, clutter can build up quickly when household items do not have a proper place.

    You do not need expensive storage systems or major changes to get things under control. A few practical adjustments can make a noticeable difference. These house organization ideas will help you use available space, keep everyday items in order, and make your home easier to maintain.

    1. Use Storage Baskets to Group Similar Items

    Storage baskets are a simple way to keep similar items together. You can use them in living rooms, bedrooms, bathrooms, and other areas where small items tend to collect.

    For example, keep remote controls, magazines, and chargers in one basket in the living room. In the bathroom, use separate baskets for skincare products, hair accessories, and toiletries. This makes it easier to find what you need without searching through drawers or shelves.

    2. Install Hooks Behind Doors

    The space behind doors often goes unused, even though it can provide extra storage. Install hooks on bedroom, bathroom, or closet doors to hang items you use regularly.

    You can use these hooks for towels, handbags, jackets, dressing gowns, and other lightweight items. They help keep things off chairs and floors while making them easy to access. Over-the-door hooks are also useful if you do not want to drill holes into walls.

    3. Organize Kitchen Cabinets by Category

    Kitchen cabinets can become messy when different items are stored together without a clear arrangement. Organize them by category so you know where everything belongs.

    Keep plates, bowls, and glasses together in one cabinet. Store pots and pans in another, and use a separate area for cooking ingredients and food containers. Place frequently used items on lower or easily accessible shelves. This arrangement makes cooking easier and reduces the time spent looking for kitchen supplies.

    4. Use Drawer Dividers for Small Items

    Drawers often become cluttered because small items get mixed together. Drawer dividers help separate these items and give everything a specific place.

    You can use them in kitchen drawers for cutlery, measuring spoons, and cooking tools. In bedrooms, they are useful for organizing socks, underwear, accessories, and other small clothing items. Adjustable dividers are a good option because you can change their size to fit different drawers.

    5. Create a Dedicated Entryway Drop Zone

    Keys, wallets, shoes, bags, and mail often end up scattered around the house. A dedicated drop zone near the entrance can prevent this problem.

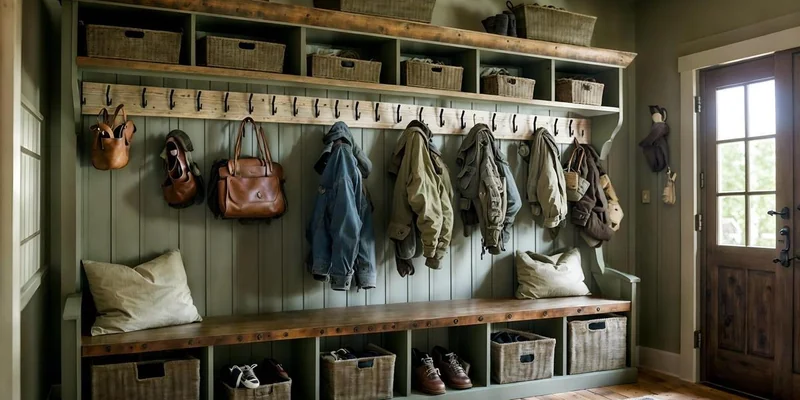
    Place a small table, wall shelf, or storage unit near the door. Add a tray for keys and other small belongings, along with hooks for bags and jackets. You can also keep a shoe rack nearby to prevent footwear from spreading across the entryway.

    6. Use Vertical Space for Extra Storage

    If your home has limited floor space, look for ways to use the walls. Vertical storage helps you keep more items organized without making rooms feel crowded.

    Install wall-mounted shelves, hanging organizers, or tall storage units in suitable areas. You can use them for books, decorative items, kitchen supplies, and household essentials. Just make sure heavier items are stored on properly secured shelves.

    7. Organize Your Pantry With Clear Containers

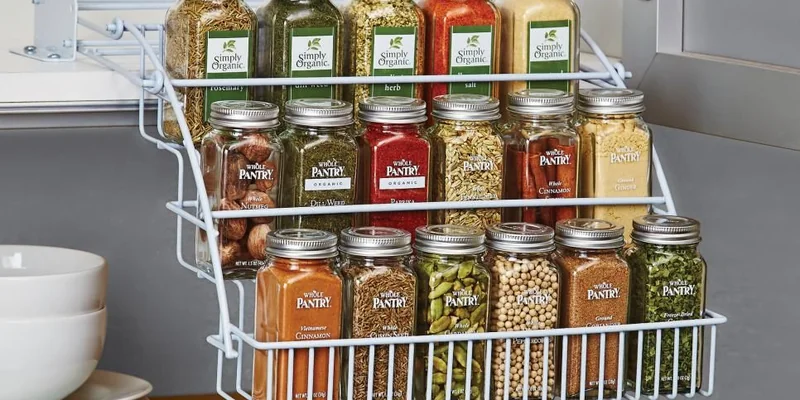
    Food packets, spices, and other pantry supplies can make shelves look messy when they are stored in their original packaging. Clear containers provide a more organized way to store dry food.

    Transfer items such as rice, flour, pasta, cereal, and lentils into airtight containers. Label each container so you can identify its contents easily. Also, arrange similar ingredients together and keep frequently used products near the front.

    8. Add Shelves to Empty Wall Spaces

    Empty walls can provide useful storage space, especially in smaller homes. Instead of adding more cabinets or furniture, consider installing a few shelves.

    Floating shelves work well in living rooms, bedrooms, kitchens, and bathrooms. Use them to store books, small baskets, toiletries, or decorative items. Avoid overcrowding the shelves, as too many objects can make the room look untidy again.

    9. Use Under-Bed Storage Boxes

    The space under your bed is useful for storing items that you do not need every day. Leaving it empty can mean missing out on extra storage space.

    Use flat storage boxes or rolling containers to keep extra bedsheets, blankets, seasonal clothes, and spare pillows. Choose containers with lids to protect items from dust. If you want easier access, look for boxes with wheels that can slide in and out without much effort.

    10. Keep Frequently Used Items Within Reach

    Storing everyday items in hard-to-reach places can make your home less convenient to use. It can also lead to clutter when you leave things wherever you find space.

    Keep frequently used belongings in accessible locations. For example, place your everyday dishes on an easy-to-reach kitchen shelf and keep commonly used toiletries near the bathroom sink. Store occasional-use items in higher cabinets or less accessible areas.

    11. Organize Your Bathroom Cabinets

    Bathroom cabinets can quickly fill up with toiletries, skincare products, cleaning supplies, and spare towels. Organizing these items by category helps you use the available space more effectively.

    Use small baskets or containers to separate different products. Keep daily essentials near the front and store extra supplies in another section. Also, check expiration dates and remove empty bottles or products you no longer use.

    12. Use Labels to Identify Storage Containers

    Labels make it easier to find items without opening every box or container. They are especially useful when you have several similar-looking storage baskets.

    Label containers according to their contents, such as cleaning supplies, winter clothes, toys, or spare toiletries. You can also label pantry jars with the names of their ingredients. Keep labels simple and easy to read so everyone in the household can follow the same organization system.

    13. Set Up a Laundry Sorting Station

    Laundry can become difficult to manage when dirty clothes are scattered across bedrooms and bathrooms. A sorting station helps keep everything in one place.

    Use separate laundry baskets for lights, darks, and delicate clothes. If you have limited space, choose a divided laundry hamper or stackable baskets. You can also keep a small basket nearby for socks and other items that need special attention before washing.

    14. Use Furniture With Built-In Storage

    Furniture with built-in storage allows you to keep household items organized without adding extra cabinets or shelves.

    For example, use an ottoman with hidden storage in the living room to keep blankets, cushions, or magazines. A bed with storage drawers can hold extra bedding and clothes, while a storage bench can provide space for shoes near the entrance. These pieces are particularly useful in smaller homes.

    15. Organize Cleaning Supplies in One Place

    Keeping cleaning products in different rooms can make them difficult to find when you need them. Set aside one suitable area for your regular cleaning supplies.

    Use a cabinet, shelf, or cleaning caddy to store sprays, cloths, brushes, sponges, and other essentials. You can also keep separate caddies for different rooms if you prefer. Make sure cleaning chemicals remain in their original containers and are stored safely away from children and pets.

    16. Use a Pegboard to Store Everyday Items

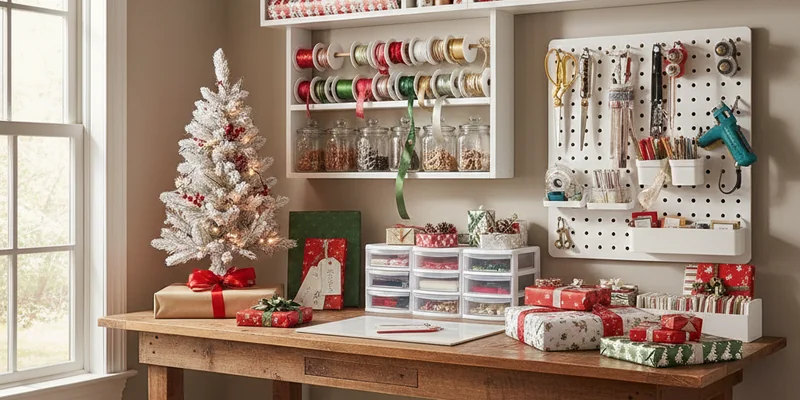
    A pegboard is a practical storage option for areas where you need to organize several small items. It allows you to hang belongings on hooks instead of keeping them scattered across surfaces.

    Install one in a garage, utility room, or home office. Use it to store tools, scissors, cables, craft supplies, and other frequently used items. You can also rearrange the hooks whenever your storage needs change.

    17. Create a Dedicated Space for Important Documents

    Important documents can easily get lost when they are mixed with everyday papers, bills, and receipts. Create a dedicated storage area to keep them organized.

    Use a filing cabinet, document box, or labeled folders for items such as bills, warranties, property documents, and personal records. Separate papers into categories so you can find them quickly. Also, remove unnecessary papers regularly to prevent the storage area from becoming overcrowded.

    18. Keep Cords and Chargers Organized

    Loose cables and chargers can make desks, entertainment units, and bedside tables look messy. They can also become tangled when several devices are connected in the same area.

    Use cable clips, cord organizers, or small storage boxes to keep wires in place. Label chargers if you have several similar ones. You can also use cable ties to group extra wire lengths and prevent them from spreading across the floor.

    19. Use Closet Organizers to Maximize Space

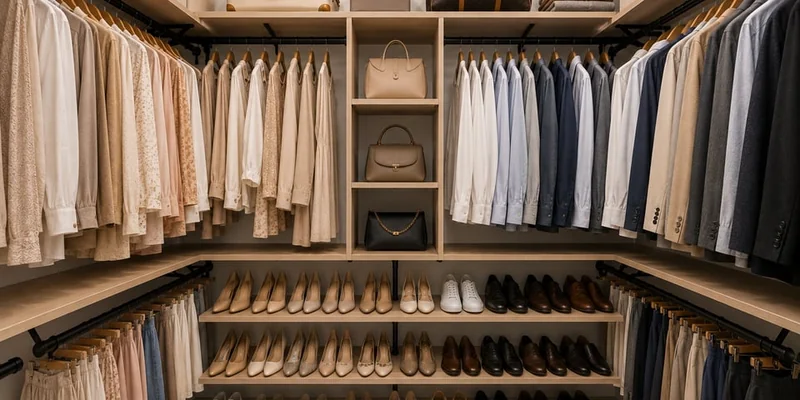
    Closets can become crowded when clothes, shoes, and accessories are stored without a proper arrangement. Closet organizers help you use shelves, hanging space, and drawers more efficiently.

    Add hanging organizers for folded clothes, shoe racks for footwear, and small bins for accessories. You can also use shelf dividers to keep bags and folded clothes in place. Arrange everyday clothing in accessible sections and move occasional-use items to higher shelves.

    20. Store Seasonal Items Separately

    Seasonal belongings take up space even when you are not using them. Keeping them separate from everyday items can make your storage areas easier to manage.

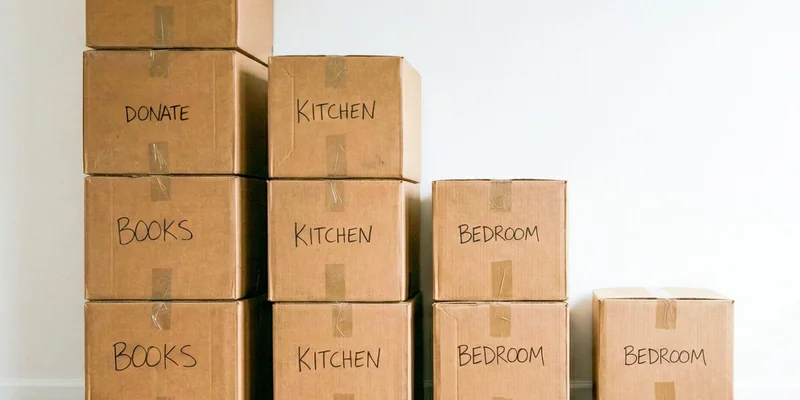
    Use labeled boxes for winter clothes, summer accessories, holiday decorations, and seasonal bedding. Store these boxes on higher closet shelves or in another suitable storage area. Before putting anything away, make sure clothes and fabrics are clean and completely dry.

    21. Add a Shoe Rack Near the Entrance

    Shoes left near the entrance can quickly create clutter and make it difficult to move around. A shoe rack gives footwear a designated place and keeps the area more organized.

    Choose a rack that fits your available space and the number of shoes in your household. You can also use a closed shoe cabinet if you prefer to keep footwear out of sight. Keep frequently worn shoes on the lower or front shelves for easy access.

    22. Organize Toys With Accessible Storage Bins

    Toys often end up scattered across living rooms and bedrooms, especially in homes with young children. Accessible storage bins make it easier to keep them organized.

    Use separate containers for building blocks, soft toys, puzzles, and other play items. Choose lightweight bins that children can reach and use without assistance. You can also add simple labels or pictures to help them identify where each toy belongs.

    23. Use a Rolling Cart for Flexible Storage

    A rolling cart provides extra storage that you can move wherever it is needed. It is useful when you do not have enough cabinet or shelf space.

    Use one in the kitchen for cooking supplies, in the bathroom for toiletries, or in the laundry area for detergents and cleaning cloths. You can also use it in a home office to store stationery and documents. Choose a cart with multiple shelves so you can separate different items.

    24. Keep Countertops Clear With Small Organizers

    Kitchen and bathroom countertops can quickly become crowded with everyday products. Keeping only essential items on these surfaces makes the rooms look tidier and easier to clean.

    Use a small tray for kitchen oils and frequently used seasonings. In the bathroom, place daily skincare products and toiletries in a compact organizer. Move occasional-use items into cabinets or drawers instead of leaving everything on the counter.

    25. Follow a Daily 10-Minute Reset Routine

    Even a well-organized home can become messy during a busy day. A short daily reset helps prevent clutter from building up.

    Spend 10 minutes returning items to their designated places. Put away clothes, clear countertops, arrange cushions, and collect items left in shared spaces. You can also ask other household members to take responsibility for their belongings. Doing a little each day makes it easier to maintain an organized home without spending hours cleaning.

    Final Words

    Organizing your home does not require expensive furniture or complicated storage systems. Simple changes, such as using baskets, adding shelves, arranging cabinets, and creating dedicated spaces for everyday belongings, can make a big difference.

    Start with the areas that cause the most clutter and introduce a few ideas at a time. Also, make tidying up part of your daily routine so your home stays organized with less effort.
  • How to Arrange Office Furniture for a More Productive Workspace

    How to Arrange Office Furniture for a More Productive Workspace

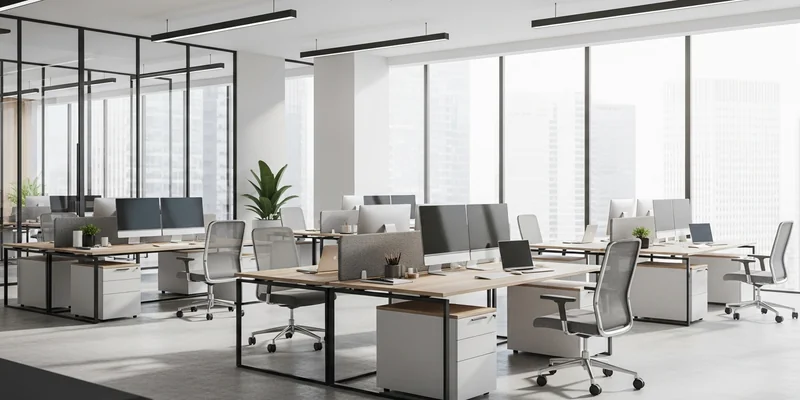
    Office furniture placement can affect how comfortably and efficiently employees work. A poorly arranged office can make movement difficult, create distractions, and leave employees with limited space. On the other hand, a well-planned layout makes it easier to focus, access supplies, and move around the office.

    Arranging office furniture does not always require buying new desks or chairs. Small changes to furniture placement can make better use of available space and create a more productive working environment.

    Plan the Office Layout Before Moving Furniture

    Before moving desks, chairs, and storage units, consider how the available space will be used. Measure the office and identify where you need workstations, meeting areas, and shared spaces.

    Think about how employees move between different areas and which furniture they use most often. For example, desks should have enough room for chairs, while shared equipment should be accessible without disrupting nearby employees.

    Planning the layout beforehand helps prevent overcrowding and unnecessary furniture movement.

    Position Desks to Support Focus and Natural Light

    Desk placement can affect both employee concentration and comfort. Whenever possible, position desks near windows to make use of natural light. However, avoid placing computer screens directly in front of or opposite bright windows, as this can cause glare.

    Also, keep desks away from busy walkways, entrances, and other areas where people frequently pass. This can reduce distractions and help employees concentrate on their tasks.

    If the office has multiple workstations, arrange desks to provide enough personal space while making communication between team members convenient.

    Arrange Office Chairs and Desks for Ergonomic Comfort

    Employees spend several hours sitting at their desks, so furniture placement should support comfortable working positions.

    Adjust office chairs so employees can keep their feet flat on the floor and their knees at a comfortable angle. Position desks at a suitable height and leave enough space underneath for leg movement.

    Computer monitors should be placed at a comfortable viewing distance, with the top of the screen around eye level. Keep keyboards and mice within easy reach to avoid unnecessary stretching.

    These adjustments can help reduce physical discomfort during long working hours.

    Keep Walkways and Common Areas Clear

    Overcrowded offices make it difficult for employees to move between workstations and access shared areas. Leave enough space between desks, chairs, cabinets, and other furniture to create clear walkways.

    Keep entrances, exits, and frequently used paths free from furniture. Also, avoid placing chairs or storage units where they can block access to other work areas.

    A clear office layout makes everyday movement easier and reduces the chances of employees bumping into furniture.

    Position Storage Furniture Near Workstations

    Filing cabinets, drawers, and shelves should be placed where employees can access them without walking across the entire office.

    Keep frequently used documents, stationery, and supplies in nearby storage units. Items that employees rarely need can be stored in cabinets away from their primary work areas.

    If several employees use the same storage furniture, place it in a shared location that everyone can reach easily. This reduces unnecessary movement and keeps individual desks less cluttered.

    Create Separate Zones for Different Office Activities

    Different office activities often require different furniture arrangements. Keeping them in separate areas can reduce distractions and make the workspace easier to use.

    For example, arrange individual desks in a dedicated work area where employees can focus on their tasks. Set up a separate meeting area with a suitable table and chairs for discussions and team meetings.

    If space allows, keep quiet workstations away from busy areas used for group discussions or informal conversations. This helps employees work without unnecessary interruptions.

    Place Shared Equipment in Convenient Locations

    Printers, copiers, scanners, and other shared equipment should be placed in locations that employees can access easily.

    A central equipment area can work well in offices where several people use the same machines. However, avoid placing noisy printers and copiers directly beside workstations where employees need to concentrate.

    Also, arrange meeting tables and visitor seating so people can access them without passing through individual work areas or blocking walkways.

    Final Words

    A productive office layout starts with placing furniture according to employees’ daily needs. Position desks for comfort and focus, keep walkways clear, and place storage and shared equipment where they are easy to access.

    Also, create separate areas for focused work and collaboration. These simple adjustments can help make better use of available office space and create a more comfortable working environment.

    Frequently Asked Questions

    1. How should office furniture be arranged for better productivity?

    Arrange desks to provide enough personal space and natural light. Keep walkways clear and place frequently used equipment within easy reach.

    2. Where should a desk be placed in an office?

    Place desks near windows for natural light, but avoid direct glare on computer screens. Keep them away from busy walkways to reduce distractions.

    3. How much space should be left between office desks?

    Leave enough space for employees to move their chairs and walk comfortably between desks. Also, keep shared walkways clear for easy movement.

    4. How can office furniture improve employee comfort?

    Ergonomic chairs and properly positioned desks help employees maintain comfortable working positions. Suitable monitor and keyboard placement can also reduce physical strain.

    5. How should shared office equipment be arranged?

    Place printers, copiers, and other shared equipment in an accessible common area. Keep noisy machines away from workstations where employees need quiet.

  • Decluttering Your Home: 20 Things You Can Let Go of Today

    Decluttering Your Home: 20 Things You Can Let Go of Today

    Decluttering your home does not have to involve a major cleanup or an entire weekend of hard work. Sometimes, getting rid of a few unnecessary items is enough to make a room feel cleaner and more organized.

    Many homes contain things that are no longer useful, from expired products and old paperwork to clothes that haven’t been worn in years.

    If you are unsure where to start, focus on items that are easy to identify and remove. Here are 20 things you can let go of today to reduce clutter and make more space in your home.

    20 Things You Can Get Rid of When Decluttering Your Home

    You do not need to clear out everything at once. Start with a few items from this list and work through the rest when you have time.

    1. Clothes You No Longer Wear

    Go through your wardrobe and look for clothes you haven’t worn in a long time. This includes outdated outfits, uncomfortable pieces, and clothes that no longer fit.

    If you keep certain clothes because you might wear them someday, consider whether that is actually likely. Donate wearable clothes that are still in good condition and discard anything that is too damaged to use.

    2. Shoes You Never Use

    Old shoes can take up a surprising amount of space in your wardrobe or shoe rack. Look for pairs that no longer fit, are uncomfortable, or have been sitting unused for months.

    Keep the shoes you wear regularly and let go of the rest. You can donate gently used pairs or recycle them if a suitable program is available.

    3. Expired Food and Pantry Items

    Check your kitchen cabinets, pantry, and refrigerator for expired food. Old spices, sauces, canned goods, snacks, and forgotten ingredients can take up valuable storage space.

    Also, remove food that has lost its quality or shows signs of spoilage. Organize the remaining items so you can easily see what you already have and avoid buying duplicates.

    4. Old Makeup and Skincare Products

    Makeup and skincare products do not last forever. Expired creams, dried-up mascaras, old lipsticks, and products that have changed in smell or texture should be removed.

    Check the expiry dates and the period-after-opening symbols on product packaging. Keeping fewer products also makes your bathroom shelves and drawers easier to organize.

    5. Empty Bottles and Containers

    Many people keep empty shampoo bottles, lotion containers, jars, and other packaging because they might need them later.

    However, these items can quickly pile up under sinks and inside kitchen cabinets. Keep only containers you regularly reuse and recycle or discard the rest.

    6. Old Receipts and Unnecessary Paperwork

    Go through your drawers and remove old shopping receipts, delivery slips, expired coupons, and documents you no longer need.

    Some paperwork, such as tax records, warranties, property documents, and important financial statements, should be kept for the required period. Shred sensitive documents before throwing them away.

    7. Broken Household Items

    Look around your home for broken chairs, damaged kitchen tools, faulty lamps, and other items that have been waiting for repairs.

    If something is inexpensive to replace and you have no realistic plan to fix it, consider letting it go. You can keep items that are worth repairing, but avoid allowing unfinished repairs to become permanent clutter.

    8. Unused Kitchen Gadgets

    Kitchen cabinets often contain gadgets and utensils that seemed useful when purchased but are rarely used.

    Look for duplicate peelers, old chopping tools, unused baking equipment, and single-purpose gadgets. Keep the items that make cooking easier and donate or discard the rest.

    9. Old Electronics and Cables

    Check your drawers for outdated phones, broken chargers, unused headphones, old remote controls, and tangled cables.

    If you no longer own the devices they belong to, there is little reason to keep them. Take working electronics to a suitable donation or resale option and use an electronic waste recycling service for damaged devices.

    10. Duplicate Household Supplies

    You may have several pairs of scissors, multiple tape dispensers, extra measuring cups, or more cleaning brushes than you need.

    Keeping a few backups is reasonable, but unnecessary duplicates take up storage space. Choose the best versions and donate or pass on the extras.

    11. Old Towels and Bed Sheets

    Check your linen closet for worn-out towels, faded bedsheets, mismatched pillowcases, and blankets that are no longer used.

    Keep enough clean linens for regular use and a small number of spares. Clean, usable items can be donated, while heavily damaged textiles may be suitable for textile recycling or cleaning rags.

    12. Unused Toys and Games

    Children often outgrow toys, board games, and puzzles. Some items may also be incomplete, broken, or no longer interesting.

    Sort through toy boxes and remove things your family no longer uses. Donate clean toys in good condition, and check that games and puzzles have their essential pieces before passing them on.

    13. Old Magazines and Newspapers

    Stacks of old magazines, newspapers, and catalogs can make tables, shelves, and storage areas look messy.

    Keep only the editions you genuinely want to read again or use for reference. Recycle the rest, especially if they have been sitting untouched for months.

    14. Unused Decorative Items

    Decorations can make a home feel more personal, but too many can create visual clutter. Look at your shelves, tables, and cabinets for ornaments, artificial flowers, picture frames, and decorative pieces you no longer like.

    You do not need to remove every decoration. Keep the items that add something to your space and let go of those that simply collect dust.

    15. Old Cleaning Products

    Check your cleaning cupboard for empty bottles, expired products, dried-up cleaners, and supplies you no longer use.

    Keep the products needed for your regular cleaning routine instead of storing several alternatives for the same purpose. Follow the label instructions when disposing of cleaning chemicals, and never mix different cleaning products.

    16. Unused Bags and Backpacks

    Most homes have extra shopping bags, old purses, backpacks, and reusable totes stored in closets or drawers.

    Keep a reasonable number of reusable bags and the backpacks or purses you actually use. Donate bags that are still in good condition and discard damaged ones that cannot be repaired.

    17. Old Bedding and Pillows

    Pillows lose their shape and support over time, while old blankets and bedding can become worn or uncomfortable.

    Check the condition of your bedding and remove anything that is no longer suitable for use. Donate clean items that meet local donation requirements and dispose of heavily damaged ones responsibly.

    18. Unused Hobby and Craft Supplies

    If you have tried different hobbies over the years, you may have leftover paint, fabric, yarn, notebooks, art supplies, or DIY materials.

    Keep the supplies for hobbies you still enjoy. Pass on usable materials to someone who can use them, and safely dispose of dried-up or damaged products.

    19. Old Phone Accessories and Promotional Items

    Promotional pens, free keychains, unused phone cases, outdated screen protectors, and random giveaways often end up in drawers.

    These small items may not seem like a problem individually, but they can accumulate over time. Keep the accessories you actually use and remove the rest.

    20. Items You Are Keeping Just in Case

    Some of the hardest things to remove are items you do not use but keep because you might need them someday.

    This could include extra containers, old packaging, unused furniture, spare household items, or clothes saved for an unlikely occasion.

    Before keeping something, ask yourself when you last used it and whether replacing it would be difficult or expensive. If it has no clear purpose and is easy to replace, it may be time to let it go.

    How to Make Decluttering Easier

    Once you have identified the things you can remove, use a simple process to avoid making a bigger mess.

    • Start with one area: Choose a single drawer, shelf, or cupboard instead of emptying an entire room.
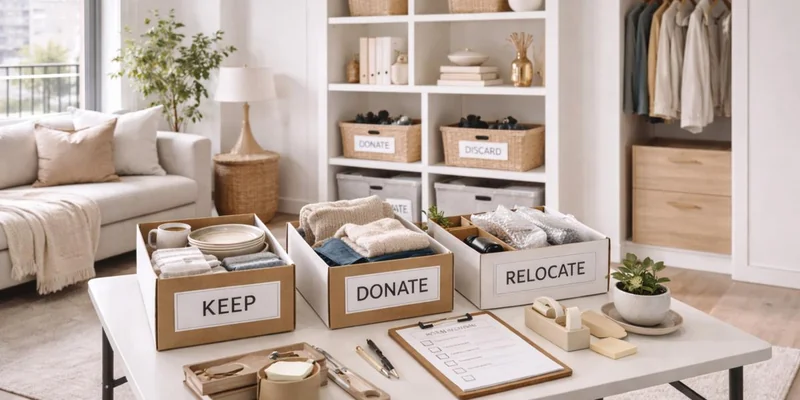
    • Use separate piles: Sort items into keep, donate, sell, recycle, and discard groups.
    • Set a time limit: Spend 15 to 30 minutes decluttering instead of trying to finish the whole house in one day.
    • Avoid moving clutter around: Do not simply transfer unused items from one room to another.
    • Remove unwanted items promptly: Take donations to a suitable location and dispose of rubbish instead of leaving sorted piles around the house.
    • Keep useful items accessible: Store frequently used belongings where you can easily reach them.

    Also, avoid buying new storage boxes before decluttering. You may find that you already have enough storage space once unnecessary items are removed.

    Final Words

    Decluttering your home becomes easier when you focus on items you no longer use, need, or enjoy. Old clothes, expired products, broken household items, unused electronics, and unnecessary paperwork are all good places to start.

    You do not have to get rid of 20 things in one day. Even removing five or six unnecessary items can make a difference. Work through one area at a time and make a habit of letting go of things that no longer serve a purpose.

  • The Ultimate Decluttering Checklist: What to Clear Out Room by Room

    The Ultimate Decluttering Checklist: What to Clear Out Room by Room

    Decluttering your home can feel like a big task, especially when you have accumulated years of clothes, household items, decorations, and other belongings. The easiest way to manage it is to work through one room at a time and decide what you actually need.

    This decluttering checklist will help you identify items you can donate, sell, recycle, or throw away. Use it as a starting point to clear unnecessary belongings and make each room easier to maintain.

    Quick Decluttering Checklist: Things to Get Rid of Around the House

    Before going room by room, start with items that commonly collect around the house. These are often easy to identify and remove.

    • Broken or damaged household items you cannot repair.
    • Expired food, medicines, and personal care products.
    • Duplicate kitchen tools, utensils, and household supplies.
    • Clothes, shoes, and accessories you no longer use.
    • Old newspapers, magazines, and unnecessary paperwork.
    • Outdated electronics, broken chargers, and unused cables.
    • Empty bottles, boxes, and packaging.
    • Decorations and accessories you no longer like.
    • Unused furniture taking up valuable space.
    • Old toys, games, and children’s items that are no longer used.

    Living Room Decluttering Checklist

    The living room often collects items from different parts of the house. Books, decorations, electronics, and everyday belongings can quickly make the space feel crowded.

    Check for these items when decluttering your living room:

    • Old magazines and newspapers: Recycle old reading materials you have already gone through. Keep only books and magazines you genuinely plan to read again.
    • Unused decorations: Remove decorative pieces, artificial plants, and accessories that no longer suit your space.
    • Broken electronics: Get rid of damaged remotes, outdated devices, and electronics you no longer use.
    • Extra cushions and blankets: Keep enough for everyday use and remove worn-out or unnecessary extras.
    • Unused furniture: Consider donating or selling side tables, chairs, and other furniture that takes up space without serving a purpose.
    • Old DVDs and CDs: Clear out discs you no longer watch or listen to, especially if you have digital alternatives.

    Kitchen Decluttering Checklist

    The kitchen is one of the easiest places to accumulate unnecessary items. Duplicate utensils, expired food, and appliances you rarely use can take up valuable cabinet and counter space.

    Use this checklist to clear out your kitchen:

    • Expired food and pantry items: Check food packages, canned goods, and other stored ingredients. Discard anything expired or spoiled.
    • Duplicate utensils: Remove extra spatulas, spoons, peelers, and other tools you rarely need.
    • Chipped dishes and containers: Get rid of cracked plates, chipped cups, and damaged food storage containers.
    • Unused appliances: Consider donating or selling appliances that have been sitting unused for months.
    • Old spices and condiments: Check expiration dates and remove stale spices, old sauces, and condiments you no longer use.
    • Extra mugs and glasses: Keep enough for your household and regular guests instead of filling cabinets with unused pieces.
    • Reusable bags and packaging: Remove torn shopping bags, unnecessary packaging, and containers without matching lids.

    Bedroom Decluttering Checklist

    Your bedroom should have enough space for sleeping, getting dressed, and storing everyday belongings. However, old clothes, unused accessories, and extra bedding can gradually fill drawers and other storage areas.

    Look for these items when decluttering your bedroom:

    • Clothes you no longer wear: Remove clothes that no longer fit, feel uncomfortable, or have not been used in a long time.
    • Worn-out shoes and accessories: Clear out damaged footwear, old belts, and accessories you no longer use.
    • Old bedding and pillows: Replace torn sheets, worn-out pillowcases, and pillows that no longer provide proper support.
    • Unused bags: Donate or sell handbags, backpacks, and travel bags that are still in good condition but rarely used.
    • Items under the bed: Check storage boxes and remove anything you no longer need.
    • Old decorations: Clear out unnecessary wall decorations, photo frames, and decorative pieces.
    • Unused bedside items: Remove old books, empty bottles, and other belongings that have collected on your nightstand.

    Bathroom Decluttering Checklist

    Bathroom cabinets and shelves often become crowded with half-used products, expired toiletries, and old grooming tools. Clearing these items makes it easier to find what you need and keep surfaces clean.

    Check for the following:

    • Expired skincare products: Check expiration dates and discard products that are past their recommended use period.
    • Old makeup: Remove expired makeup, dried-out products, and items you no longer use.
    • Empty bottles: Get rid of empty shampoo, conditioner, body wash, and skincare containers.
    • Worn-out towels: Replace towels that are heavily worn, damaged, or no longer absorb water properly.
    • Unused grooming tools: Clear out broken hairbrushes, old razors, and grooming tools you no longer need.
    • Old bath mats: Remove mats that are worn out, damaged, or difficult to clean.
    • Extra toiletries: Keep only the products you regularly use and remove unnecessary duplicates.

    Closet and Wardrobe Decluttering Checklist

    Closets can become overcrowded even when you feel like you have nothing to wear. This usually happens because of clothes you no longer use, old accessories, and items kept for occasions that rarely come around.

    Go through your wardrobe and remove:

    • Clothes that no longer fit: Set aside clothes that are too small or too large and are unlikely to be worn again.
    • Damaged clothing: Remove clothes with permanent stains, holes, or damage that cannot be repaired.
    • Uncomfortable outfits: Clear out clothes you avoid wearing because of their fit, fabric, or style.
    • Duplicate accessories: Keep the items you use most and remove unnecessary duplicates.
    • Unused handbags and shoes: Donate or sell items that are still in good condition but have not been used.
    • Old hangers: Remove broken hangers and extras that take up unnecessary space.
    • Seasonal clothing you no longer wear: Check winter coats, summer outfits, and other seasonal pieces for items you no longer need.

    Home Office Decluttering Checklist

    A home office can quickly become cluttered with paperwork, stationery, electronics, and miscellaneous supplies. Keeping unnecessary items around can make it harder to find important documents and maintain an organized workspace.

    Clear out these items:

    • Old paperwork: Shred or recycle documents you no longer need. Keep important financial, legal, and personal records safely stored.
    • Unused stationery: Remove dried-out pens, broken pencils, empty notebooks, and supplies you never use.
    • Broken chargers and cables: Get rid of damaged cables and chargers for devices you no longer own.
    • Outdated electronics: Remove old keyboards, mice, headphones, and other accessories that no longer work or serve a purpose.
    • Empty folders and files: Clear out unnecessary folders, binders, and storage containers.
    • Old notes and printouts: Recycle outdated notes, duplicate printouts, and papers that are no longer useful.

    Laundry Room and Storage Area Decluttering Checklist

    Laundry rooms and storage areas often become dumping grounds for things you do not know where to put. Go through these spaces carefully because they may contain items you have not used in years.

    Look for the following:

    • Empty detergent bottles: Recycle empty laundry detergent, fabric softener, and cleaning product containers.
    • Old cleaning supplies: Remove expired or unusable products and dispose of them according to their labels.
    • Broken laundry baskets: Get rid of damaged baskets, hampers, and drying racks.
    • Extra hangers: Keep enough hangers for your laundry needs and remove unnecessary extras.
    • Unused household items: Donate or sell items that are still useful but have been sitting in storage.
    • Damaged seasonal decorations: Remove broken lights, damaged ornaments, and decorations you no longer use.
    • Old storage boxes: Break down empty cardboard boxes and remove containers that no longer serve a purpose.

    Garage and Entryway Decluttering Checklist

    Garages and entryways often collect things that do not have a proper place elsewhere in the home. These spaces can become difficult to use when old equipment, shoes, tools, and miscellaneous belongings pile up.

    Use this checklist to clear them out:

    • Unused sports equipment: Donate or sell equipment for activities you no longer participate in.
    • Broken tools: Remove damaged tools and accessories that cannot be repaired or safely used.
    • Old shoes and coats: Clear out footwear, jackets, and outerwear that no one in the household wears.
    • Unnecessary bags and umbrellas: Keep a few useful options and remove damaged or duplicate items.
    • Old gardening supplies: Get rid of broken pots, damaged tools, and empty gardening product containers.
    • Unused outdoor equipment: Check old furniture, camping gear, and other outdoor items you no longer need.
    • Miscellaneous stored items: Go through boxes and remove belongings that have been sitting unused for years.

    How to Use This Decluttering Checklist

    A checklist can help you identify unnecessary belongings, but having a simple process makes the actual work easier. Follow these steps to avoid getting overwhelmed:

    1. Start with one room: Choose a manageable space instead of trying to declutter your entire home in one day.
    2. Work through each category: Use the checklist to identify items you no longer need. Check drawers, cabinets, shelves, and storage spaces.
    3. Create separate piles: Sort belongings into four categories: keep, donate, sell, and discard.
    4. Be realistic about what you need: Avoid keeping things simply because you might use them someday. Consider how often you actually use each item.
    5. Remove unwanted items: Take donations to a suitable location, arrange to sell useful belongings, and dispose of waste properly.
    6. Repeat the process: Review each room every few months to prevent unnecessary items from building up again.

    Conclusion

    Decluttering your home becomes easier when you break the work into smaller tasks. Use this room-by-room checklist to identify belongings you no longer need and decide what to keep, donate, sell, or discard.

    You do not have to complete everything in one day. Start with one room, work through the list, and gradually make more space in your home.

    Frequently Asked Questions

    1. What should I get rid of first when decluttering?

    Start with broken items, expired products, empty containers, and things you no longer use. These are usually the easiest items to remove.

    2. How often should I declutter my home?

    A quick decluttering session every few months can help prevent clutter from building up. Some areas, such as kitchen cabinets and bathroom storage, may need more frequent attention.

    3. How do I declutter when I have too much stuff?

    Start with one room or a small area instead of tackling the entire house. Sort items into keep, donate, sell, and discard piles.

    4. What should I do with items I no longer need?

    Donate usable items, sell belongings that still have value, and recycle or discard damaged items. Avoid keeping unwanted things in storage for too long.

    5. How do I decide what to keep when decluttering?

    Keep items you regularly use, genuinely need, or have meaningful personal value. Let go of things that only take up space without serving a purpose.

  • How to Declutter When You Don’t Know Where to Start

    How to Declutter When You Don’t Know Where to Start

    Looking at a cluttered home can make it difficult to decide what to do first. You might notice messy countertops, overflowing drawers, piles of clothes, and things that no longer have a proper place. Trying to tackle everything at once can make the task feel even bigger.

    The easiest way to get started is to break decluttering into smaller tasks. You don’t need to organize your entire home in one day. Start with a manageable area, make a few simple decisions, and gradually work through the rest of your belongings.

    Identify the Most Cluttered Areas

    Before picking up anything, walk through your home and identify the areas that need the most attention. Notice which spaces have accumulated the most clutter and which ones make your daily routine difficult.

    For example, your kitchen countertops might be covered with unused appliances, or your bedroom might have piles of clothes on the floor. You may also have a crowded entryway where shoes, bags, and other belongings collect.

    Make a short list of these areas and decide which one to tackle first. Prioritize spaces that you use frequently or that make your home feel particularly messy. This gives you a clear starting point instead of trying to work on several rooms at once.

    Start With One Small Area

    Once you have identified where to begin, choose a small area within that space. It could be a single drawer, one shelf, a kitchen countertop, or a bedside table.

    Avoid starting with an entire room, especially if it contains several years of accumulated belongings. A large task can take hours and leave you with even more mess if you cannot finish it.

    Instead, focus on completing one small area. Take everything out, separate the items you want to keep from those you no longer need, and put the remaining belongings back neatly.

    Completing even a small section can make the room feel more manageable. You can then move to another shelf or drawer when you are ready.

    Get Rid of Obvious Trash First

    If you are struggling to decide what to remove, start with things that clearly belong in the trash. These items usually do not require much thought, making them an easy first step.

    Look for empty product containers, expired toiletries, old receipts, unnecessary packaging, broken items, and papers you no longer need. Also, check your kitchen for expired food and unused packaging taking up cabinet space.

    Carry a trash bag with you as you move through the area. Remove these items before sorting the rest of your belongings.

    This simple step can clear some visible clutter and make it easier to focus on things that require more consideration.

    Sort Items Into Keep, Donate, and Discard Piles

    After removing obvious trash, start sorting the remaining belongings. A simple way to do this is to create three separate piles:

    • Keep: Items you regularly use, need, or genuinely want to keep.
    • Donate: Belongings that are still in good condition but no longer serve a purpose in your home.
    • Discard: Broken, damaged, or unusable items that cannot be donated.

    As you sort, try to make decisions based on how useful each item is. If you have several similar items, consider whether you actually need all of them.

    You can also create a separate box for things that belong in other rooms. For example, put misplaced books, kitchen utensils, and bathroom products together so you can return them to their proper places later.

    Avoid leaving sorted items in piles for several days. Put away the things you want to keep and arrange to donate or discard the rest.

    Declutter One Category at a Time

    Sometimes, clutter is spread across different rooms. You might have clothes in your bedroom, books in the living room, and unused kitchen items in several cabinets.

    In this situation, working through one category at a time can make the process easier. Instead of focusing on individual rooms, choose a specific type of belonging and decide what you want to keep.

    For example, when decluttering clothes, look for items that no longer fit, have not been worn in a long time, or are no longer in good condition. When sorting kitchenware, remove duplicate utensils, unused containers, and appliances you rarely need.

    You do not have to gather every item from the entire house at once. Start with one category in a manageable area and continue when you have finished.

    Deal With Items You’re Unsure About

    Some belongings are harder to remove than others. You might keep old clothes because they were expensive, hold onto gifts because someone gave them to you, or save unused items because you think you might need them someday.

    Instead of spending too much time on these decisions, ask yourself a few simple questions:

    • When did I last use this item?
    • Do I have another item that serves the same purpose?
    • Would I buy this again if I needed it today?
    • Do I have enough space to keep it?

    Your answers can help you decide whether something deserves a place in your home.

    If you are still unsure, put the item in a separate box and revisit it later. This gives you time to think without interrupting your progress. However, avoid turning this box into permanent storage. Set a date to review its contents and make a final decision.

    Work Through Your Home Room by Room

    Once you have finished your first area, gradually move through the rest of your home. Working room by room gives you a clear order and helps prevent you from jumping between unrelated tasks.

    You can follow a simple order:

    • Bedroom: Declutter clothes, bedside tables, dressers, and under-bed storage.
    • Kitchen: Sort utensils, cookware, food containers, pantry items, and countertops.
    • Living room: Remove unused decorations, old magazines, unnecessary electronics, and items that do not belong there.
    • Bathroom: Check toiletries, expired products, old towels, and unused storage items.
    • Entryway: Sort shoes, bags, jackets, and other belongings that collect near the entrance.

    Break each room into smaller sections if it contains too much clutter. Finish one section before moving to the next.

    Also, avoid shifting unwanted belongings into another room just to make the current space look clean. Decide where each item belongs and remove things you no longer need.

    Final Words

    When you don’t know where to start decluttering, focus on making the first step as simple as possible. Identify the areas that need attention, choose one small section, and begin removing things you no longer use.

    You can gradually work through different categories and rooms as you make progress. There is no need to finish everything in one day. A few manageable tasks at a time can help you clear your home without feeling overwhelmed.

    Frequently Asked Questions

    1. What is the easiest way to start decluttering?

    Start with one small area, such as a drawer, shelf, or countertop. Remove obvious trash and sort the remaining items.

    2. What should I declutter first?

    Start with areas that have the most visible clutter or affect your daily routine. Kitchen counters, bedroom surfaces, and entryways are good places to begin.

    3. How do I decide what to throw away when decluttering?

    Get rid of broken items, expired products, and belongings you no longer use. Donate things that are still in good condition but no longer serve a purpose in your home.

    4. How long should I spend decluttering each day?

    Start with 15 to 30 minutes a day if you have a busy schedule. You can gradually increase the time as you become more comfortable with the process.

    5. How do I declutter when I feel overwhelmed?

    Break the task into smaller sections instead of trying to organize an entire room at once. Focus on one manageable area and take breaks when needed.

  • 15 Cabinet Door Storage Ideas That Make Use of Every Inch

    15 Cabinet Door Storage Ideas That Make Use of Every Inch

    Cabinet doors offer extra storage space that often goes unused. With a few simple organizers, you can turn their empty surfaces into useful spots for everyday items. This works especially well in small kitchens and bathrooms where shelf and counter space is limited.

    From adhesive hooks to hanging baskets, here are 15 cabinet door storage ideas to help you make better use of every inch.

    1. Install an Over-the-Door Organizer

    An over-the-door organizer gives you extra storage without taking up shelf space. Choose one with multiple pockets or compartments to hold lightweight kitchen supplies, cleaning products, or pantry items. You can also use clear organizers to see what’s inside without removing everything. Make sure the organizer fits the cabinet door properly and does not prevent it from closing.

    2. Add Adhesive Hooks

    Adhesive hooks are an easy way to use empty cabinet door space. Stick a few hooks to the inside of a door to hang measuring cups, oven mitts, kitchen utensils, or small tools. You can arrange the hooks according to the size of your items to keep everything within reach. They are also easy to install without drilling holes, making them a good option for renters.

    3. Use a Spice Rack

    Mount a slim spice rack inside a kitchen cabinet door to keep your spice jars organized. This makes frequently used seasonings easier to find while freeing up space on your shelves.

    You can arrange the jars alphabetically or group them by use, such as baking spices and everyday seasonings. Choose a rack with enough depth and secure holders to keep the jars from falling when you open the door.

    4. Hang a Cutting Board Holder

    Cutting boards can take up considerable space inside kitchen cabinets, especially when you have several sizes.

    A mounted cutting board holder keeps them upright and organized on the inside of a cabinet door. Look for a design with separate slots so you can store different boards without stacking them on top of each other. This also allows them to dry properly before storage.

    5. Add a Paper Towel Holder

    A paper towel holder mounted inside a cabinet door keeps rolls within easy reach without taking up counter space.

    Install it on a door near your kitchen sink or food preparation area so you can grab a sheet whenever needed. Some holders use simple brackets, while others have a spring-loaded design for easy roll replacement. Check that the roll has enough clearance when you close the cabinet door.

    6. Install a Lid Organizer

    Pot and pan lids can be difficult to stack neatly, especially when you have several different sizes. A cabinet door lid organizer gives each lid its own space and keeps them from sliding around.

    You can find adjustable racks that fit different lid sizes and allow you to arrange them vertically. Install the organizer on a sturdy cabinet door and make sure the lids do not hit the shelves when you close it.

    7. Create a Cleaning Supply Station

    Turn the inside of a cabinet door into a small cleaning supply station. Attach a few baskets or racks to hold sponges, scrub brushes, cleaning cloths, and other lightweight supplies.

    This works particularly well under the kitchen sink, where cleaning products are usually stored. You can use separate containers for different items to keep them organized and prevent wet sponges or brushes from making a mess.

    8. Mount a Measuring Cup and Spoon Rack

    Measuring cups and spoons are small but can easily get lost in crowded kitchen drawers. Attach a small rack or a few hooks to the inside of a cabinet door to keep them together.

    Arrange the cups and spoons by size so you can quickly find the measurement you need. You can also label the hooks with measurements to make putting everything back in its proper place easier.

    9. Add a Small Storage Basket

    A small basket can hold items that otherwise get scattered across cabinet shelves. Use it for food storage bags, kitchen wraps, small packets, or other lightweight supplies.

    Wire baskets are a good option because they allow you to see what’s inside, while plastic baskets are easy to wipe clean. Choose a basket with a suitable depth so your items stay in place when the cabinet door opens and closes.

    10. Install a Foil and Plastic Wrap Dispenser

    Aluminum foil, plastic wrap, and parchment paper rolls can take up unnecessary space in kitchen drawers. Mount a dedicated dispenser inside a cabinet door to keep them organized and easy to access.

    Some dispensers also include built-in cutters, so you can pull out the amount you need without struggling with the packaging. Choose a model that fits your rolls and leaves enough room for the cabinet door to close.

    11. Use a Hair Tool Organizer

    The inside of a bathroom cabinet door can provide useful storage for hair dryers, straighteners, and curling irons. Install a dedicated hair tool organizer with separate compartments for each item.

    Some models also include hooks for storing cords and keeping them from getting tangled. If you store heated tools, make sure the organizer is designed to withstand heat and let the tools cool before putting them away.

    12. Add a Toothbrush and Toiletry Holder

    Keep bathroom essentials organized with a compact holder attached to the inside of a cabinet door. Use it for toothbrushes, toothpaste, floss, and other small toiletries. A holder with separate compartments helps prevent items from getting mixed up, especially when several people share the bathroom.

    Choose one with removable or washable sections so you can clean it regularly and prevent toothpaste residue from building up.

    13. Install a Small Mirror

    A small mirror on the inside of a bathroom cabinet door gives you a convenient grooming spot without using additional wall space. You can attach a lightweight mirror with suitable mounting strips or hardware.

    This is particularly useful if your bathroom has limited wall space or you prefer keeping your grooming items inside the cabinet. Make sure the mirror is securely attached and does not interfere with the shelves when the door closes.

    14. Add a Jewelry Organizer

    Use the inside of a bedroom or bathroom cabinet door to store your everyday jewelry. Small hooks work well for necklaces and bracelets, while hanging pockets can hold earrings and other accessories.

    You can also use a compact organizer with separate sections for rings and small pieces. Keeping jewelry in individual spaces helps prevent chains from tangling and makes it easier to find what you need.

    15. Create a Medicine and First-Aid Organizer

    Small bins or pockets can turn a cabinet door into a convenient first-aid storage area. Use them for bandages, gauze, adhesive tape, and other basic supplies.

    You can separate items into different compartments so you can quickly find what you need during minor injuries. Keep medicines in their original packaging and store them according to their label instructions. Also, make sure children cannot access the organizer.

    Tips for Making the Most of Cabinet Door Storage

    Before adding organizers, keep a few things in mind:

    • Measure the available space: Check the door’s width and height, along with the clearance between the door and shelves.
    • Choose lightweight items: Avoid placing heavy objects on cabinet doors, as too much weight can strain the hinges.
    • Check the door clearance: Make sure your organizers and stored items do not hit shelves or prevent the door from closing.
    • Use suitable mounting options: Adhesive hooks and strips work well for lightweight items, while heavier organizers may need screws.
    • Keep frequently used items accessible: Store everyday supplies where you can reach them easily.
    • Avoid overcrowding: Leave enough room between items so you can remove them without disturbing everything else.

    Conclusion

    Cabinet doors provide extra storage space for items that often clutter shelves, drawers, and countertops. You don’t need expensive organizers or complicated installations to make use of this space.

    A few hooks, racks, or small baskets can help keep everyday supplies organized and within reach. Start with one or two cabinet doors and choose storage solutions that fit your available space and the items you use most often.

    Frequently Asked Questions

    1. What can you store on the inside of cabinet doors?

    You can store spices, cleaning supplies, measuring cups, utensils, toiletries, and other small items. Use hooks, baskets, and racks to keep everything organized.

    2. How do you organize the inside of kitchen cabinet doors?

    Install hooks, spice racks, lid holders, or small baskets based on what you need to store. Make sure the organizers fit properly without blocking the shelves.

    3. How much weight can a cabinet door hold?

    It depends on the cabinet’s construction, hinges, and mounting hardware. Avoid storing heavy items unless the door and hinges can support the extra weight.

    4. How can I attach organizers to cabinet doors without drilling?

    You can use adhesive hooks, mounting strips, or over-the-door organizers. Check their weight limits before adding items.

    5. Are cabinet door organizers worth it?

    Yes, they help you use otherwise empty space and keep everyday items within reach. They are especially useful in small kitchens and bathrooms with limited storage.

  • How to Stay Organized During Christmas: 12 Stress-Saving Tips

    How to Stay Organized During Christmas: 12 Stress-Saving Tips

    Christmas is a busy time of year. Between shopping, decorating, cooking, cleaning, and family gatherings, it is easy to feel overwhelmed. Without a little planning, even simple holiday tasks can become stressful.

    The good news is that you do not have to do everything at once. A few simple organizational habits can help you manage your time, keep your home tidy, and enjoy the holiday season. Here are 12 practical tips to help you stay organized during Christmas.

    1. Create a Christmas To-Do List

    Start by writing down everything you need to do before Christmas. This may include buying gifts, decorating your home, preparing meals, cleaning, and arranging family gatherings.

    Once you have your list, divide larger tasks into smaller steps. For example, instead of writing “prepare for Christmas dinner,” list the dishes you need to make and the ingredients you need to buy.

    You can use a notebook, phone app, or simple calendar to keep track of everything. Check off each task as you complete it so you can see your progress.

    2. Set a Christmas Budget

    Christmas shopping and celebrations can quickly become expensive. Setting a budget helps you manage your spending and avoid financial stress after the holidays.

    Decide how much you can afford to spend on Christmas. Then divide that amount into different categories, such as:

    • Gifts
    • Food and drinks
    • Decorations
    • Travel and transportation
    • Parties and other activities

    Keep track of your spending as you shop. Also, leave a little room for unexpected expenses so small surprises do not affect your entire budget.

    3. Plan Your Christmas Shopping Early

    Leaving Christmas shopping until the last few days can mean crowded stores, limited choices, and unnecessary stress. Start making your shopping list early, so you have enough time to find what you need.

    Write down the names of people you want to buy gifts for and add a gift idea next to each name. This will help you avoid buying random items at the last minute.

    Also, try to purchase decorations, food supplies, and other Christmas essentials ahead of time. If you plan to shop online, order early to allow enough time for delivery.

    4. Organize Your Christmas Decorations

    Before putting up your Christmas decorations, take some time to sort through the items you already have. Separate lights, ornaments, wreaths, ribbons, and other decorations into groups.

    Check your Christmas lights to make sure they work before hanging them. Also, get rid of broken decorations and items you no longer need.

    When you finish decorating, store everything in labeled boxes or containers. Keep similar items together so you can easily find them next Christmas.

    5. Declutter and Clean Your Home

    A clean and organized home makes Christmas preparations easier, especially if you are expecting guests. However, you do not need to deep-clean every corner of your house before the holidays.

    Start by removing unnecessary items from living rooms, dining areas, and other common spaces. Clear countertops, organize shelves, and put away things that do not belong in those areas.

    You can also divide cleaning tasks across several days. For example, clean the kitchen one day, organize the living room the next, and prepare guest areas afterward. This way, you will not have to handle everything at once.

    6. Plan Your Christmas Meals in Advance

    Food preparation can take up a lot of time during Christmas. Planning your meals ahead makes grocery shopping and cooking much easier.

    Decide what you want to serve for Christmas dinner and other holiday gatherings. Write down all the ingredients you need and check your kitchen before buying anything.

    Also, prepare whatever you can in advance. You can chop vegetables, prepare sauces, marinate meat, or make desserts a day or two before Christmas. This leaves you with fewer tasks to handle on the actual day.

    7. Organize Your Christmas Gifts

    Once you start buying gifts, keep them in one designated place instead of spreading them around the house. A spare cupboard, storage box, or empty shelf can work well.

    Wrap gifts as soon as you have enough time instead of waiting until Christmas Eve. Label each package with the recipient’s name to avoid confusion.

    Also, keep wrapping paper, scissors, tape, ribbons, and gift bags together. Having everything in one place makes gift wrapping quicker and easier.

    8. Prepare a Christmas Calendar

    A Christmas calendar helps you keep track of important dates and avoid forgetting plans. Add family gatherings, parties, shopping days, and other holiday events.

    You can also use it to schedule your preparation tasks. For example, set one day for gift shopping, another for decorating, and a separate day for grocery shopping.

    A wall calendar, planner, or phone calendar can all work. Set reminders for important events so you do not have to keep everything in your head.

    9. Prepare for Christmas Guests

    If you are expecting guests, start preparing your home before they arrive. This gives you enough time to arrange sleeping spaces, clean common areas, and gather essential supplies.

    If guests will stay overnight, prepare fresh bedding, clean towels, pillows, and basic toiletries. Also, make sure there is enough space for their luggage and personal belongings.

    If you are hosting a Christmas gathering, think about seating arrangements, serving dishes, and drinks in advance. These small preparations can make the day easier for everyone.

    10. Keep Christmas Supplies in One Place

    Christmas supplies can easily get scattered around the house. You might have gift bags in one cupboard, wrapping paper in another, and decorations stored somewhere else.

    Choose a dedicated space for your holiday supplies. Use separate boxes or containers for gift-wrapping supplies, ribbons, cards, decorations, Christmas cards, and other essentials.

    Label each container so you can find things without searching through several boxes. This also makes packing everything away after Christmas much easier.

    11. Delegate Tasks to Family Members

    You do not have to handle every Christmas task yourself. Sharing responsibilities with family members can save time and make preparations less stressful.

    For example, one person can decorate the Christmas tree while another handles gift wrapping. Children can help with simple tasks, such as arranging decorations or setting the table.

    You can also divide cooking and cleaning duties among family members. Agree on everyone’s responsibilities early so no one has to rush at the last minute.

    12. Leave Some Room for Flexibility

    Even with careful planning, things do not always go as expected. A delivery might arrive late, a dish may take longer to prepare, or an unexpected task may come up.

    Avoid filling every day with Christmas activities. Leave some free time in your schedule so you can handle unexpected changes without feeling overwhelmed.

    Also, remember that everything does not have to be perfect. Focus on spending time with loved ones and enjoying the holiday rather than worrying about every small detail.

    Conclusion

    Staying organized during Christmas does not have to be difficult. Creating a to-do list, planning your shopping, organizing supplies, and sharing responsibilities can make holiday preparations much easier.

    Start early, handle a few tasks each day, and leave some room for unexpected changes. This will help you spend less time worrying about preparations and more time enjoying Christmas.

    Frequently Asked Questions

    1. How early should I start preparing for Christmas?

    You can start preparing for Christmas in November or even earlier. This gives you enough time to shop, decorate, and organize everything without rushing.

    2. How can I avoid stress during Christmas?

    Make a to-do list and divide your tasks across several days. Also, set a budget and ask family members to help with preparations.

    3. How do I keep my home organized during Christmas?

    Keep decorations, gifts, and other holiday supplies in designated storage spaces. Clean common areas regularly and put things back after using them.

    4. How can I organize Christmas gifts?

    Make a list of everyone you want to buy gifts for and keep track of your purchases. Store wrapped gifts in one place and label each package with the recipient’s name.

    5. What should I do the day before Christmas?

    Finish any remaining cleaning, food preparation, and gift wrapping. Also, check your plans and make sure everything you need for Christmas Day is ready.

  • How to Declutter Your Home: A Room-by-Room Plan for Beginners

    How to Declutter Your Home: A Room-by-Room Plan for Beginners

    Decluttering your home can feel like a big task, especially when you have years of accumulated belongings. However, you don’t need to organize everything in one day. Working through your home one room at a time makes the process easier and less stressful.

    The key is to start small, decide what you actually need, and find a proper place for the things you want to keep. This room-by-room plan will help you get started and make your home easier to manage.

    Prepare Before You Start Decluttering

    Before going through your belongings, take a little time to prepare. Having a simple plan will help you stay organized and avoid making a bigger mess.

    Here are a few things to do first:

    • Gather your supplies: Keep some trash bags, boxes, and cleaning cloths nearby.
    • Create sorting categories: Prepare four categories: Keep, Donate, Sell, and Throw Away. This will help you decide where each item belongs.
    • Start with a small area: If a room feels overwhelming, begin with one drawer, shelf, or corner.

    Once everything is ready, you can start working through your home.

    Declutter Your Living Room

    The living room often collects items from different parts of the home. You may find old magazines, unused decorations, toys, and other belongings that don’t need to be there.

    Start by removing anything that belongs in another room. Then work on the following areas:

    • Books and magazines: Keep the books you enjoy or plan to read. Recycle old magazines and papers you no longer need.
    • Decorations: Remove decorations that you no longer like or that take up too much space.
    • Furniture: Consider removing unused chairs, side tables, or other furniture that makes the room feel crowded.
    • Entertainment area: Organize remote controls, gaming accessories, cables, and other items around your TV.

    Finish by wiping down the surfaces and arranging the remaining items neatly.

    Declutter Your Kitchen

    Kitchens can collect many unused utensils, duplicate tools, old containers, and expired food items. Removing these things will free up cabinet space and make cooking easier.

    Start with your countertops, then move to cabinets, drawers, and pantry shelves.

    • Expired food: Check your refrigerator, freezer, and pantry. Throw away expired or spoiled food.
    • Kitchen tools: Remove broken utensils, damaged cookware, and tools you never use.
    • Food containers: Get rid of containers without matching lids or those that are cracked or damaged.
    • Countertops: Remove appliances and other items you rarely use. Keep only the essentials within easy reach.
    • Pantry items: Group similar foods together and place frequently used ingredients where you can easily reach them.

    Also, avoid keeping too many duplicate items. A few useful kitchen tools are usually enough for everyday cooking.

    Declutter Your Bedroom

    Your bedroom should be a comfortable place to rest. However, clothes, shoes, accessories, and other belongings can quickly take over the available space.

    Start with your wardrobe and work your way around the room.

    • Clothes: Separate the clothes you regularly wear from those you no longer need. Donate or sell items that are still in good condition.
    • Shoes and bags: Keep the pairs and bags you actually use. Remove damaged or unused ones.
    • Nightstands: Clear old receipts, empty bottles, books, and other unnecessary items from your bedside table.
    • Dressers: Sort through drawers and remove items you no longer need.
    • Under the bed: Check for old boxes, unused shoes, and other forgotten belongings.

    Once you’re done, arrange your remaining clothes and accessories so you can easily find them.

    Declutter Your Bathroom

    Bathrooms usually have limited storage space, so even a few unnecessary products can make them feel cluttered.

    Go through your cabinets, drawers, and shelves. Remove the following items:

    • Expired skincare, makeup, and personal care products.
    • Empty shampoo, conditioner, and body wash bottles.
    • Old toothbrushes and worn-out grooming tools.
    • Unused toiletries and products you no longer like.
    • Expired medicines that need proper disposal.

    After sorting everything, group similar products together. For example, keep skincare products in one section and hair care products in another.

    Declutter Your Home Office

    A home office can quickly become cluttered with paperwork, stationery, cables, and electronic accessories. Keeping this area organized can also make it easier to focus on your work.

    Start by clearing your desk and sorting through the items around it.

    • Paperwork: Shred or recycle unnecessary documents. Keep important papers in labeled folders.
    • Stationery: Remove dried-out pens, broken supplies, and items you no longer use.
    • Cables and chargers: Keep the cables you need and remove damaged or duplicate ones.
    • Electronics: Set aside old devices and accessories you no longer use. Recycle electronic waste responsibly.
    • Desk space: Remove unnecessary decorations and other items that take up working space.

    Try to keep your desk clear except for the things you use regularly.

    Declutter Your Entryway and Hallways

    Entryways and hallways are easy to overlook when decluttering. However, they often collect shoes, coats, bags, keys, and mail.

    Start by removing anything you no longer need. Then organize the remaining belongings.

    • Keep only the shoes you regularly wear near the entrance.
    • Remove old coats, jackets, and bags that you no longer use.
    • Create a small space for keys, wallets, and other everyday essentials.
    • Sort through old mail and throw away unnecessary papers.
    • Remove decorations and furniture that make walkways difficult to use.

    Keep these areas as clear as possible so you can move around easily.

    Declutter Storage Areas and Closets

    Storage rooms, closets, and garages often become dumping grounds for things we don’t know where to put. Over time, these spaces can fill up with forgotten belongings.

    Take everything out of one section at a time and sort through it.

    • Old boxes: Open stored boxes and check what’s inside. Remove anything you no longer need.
    • Seasonal items: Keep useful seasonal clothes, decorations, and equipment, but avoid storing things you haven’t used in years.
    • Unused belongings: Donate or sell items that are still in good condition.
    • Broken items: Get rid of damaged belongings that cannot be repaired or reused.
    • Storage containers: Use labeled boxes to group similar items together.

    Also, avoid filling empty storage space with unnecessary purchases. The goal is to make storage areas easier to use, not to fill every available space.

    What to Do With Items You No Longer Need

    Once you’ve finished sorting your belongings, decide what to do with each item. Don’t let unwanted things sit in boxes for months.

    Here are a few simple options:

    • Donate: Give usable clothes, books, furniture, and household items to local charities or people who need them.
    • Sell: Sell valuable items that are still in good condition through local marketplaces.
    • Recycle: Recycle paper, cardboard, glass, plastic, and other suitable materials.
    • Throw away: Dispose of damaged or unusable items responsibly.

    Try to remove the unwanted items from your home as soon as possible. This will prevent them from becoming another source of clutter.

    Simple Tips to Keep Your Home Clutter-Free

    Decluttering your home is one thing, but keeping it organized requires regular effort. A few simple habits can help prevent clutter from building up again.

    • Put things back after using them: Return items to their proper places instead of leaving them on countertops, tables, or chairs.
    • Follow the one-in, one-out rule: When you bring something new into your home, consider removing a similar item you no longer need.
    • Spend 10–15 minutes tidying up: A short daily cleanup can help keep your home organized.
    • Avoid unnecessary purchases: Think before buying something new. Make sure you actually need it and have space for it.
    • Declutter regularly: Check your drawers, cabinets, and storage areas every few months to remove things you no longer use.

    These small habits can make it much easier to maintain a tidy home.

    Conclusion

    Decluttering your home doesn’t have to be a difficult or exhausting task. Start with one room, sort through your belongings, and remove the things you no longer need. You can work at your own pace and move to the next room when you’re ready.

    Also, remember that keeping your home organized is an ongoing process. A little regular effort can prevent clutter from building up and make your living space easier to manage.

    Frequently Asked Questions

    1. What is the easiest way to start decluttering your home?

    Start with one small area, such as a drawer, shelf, or corner. Sort your belongings into things to keep, donate, sell, or throw away.

    2. Which room should I declutter first?

    Start with the room that feels easiest to organize. You can begin with your bedroom, living room, or any area that needs attention.

    3. How often should I declutter my home?

    A quick decluttering session every few weeks can help keep your home organized. You should also do a bigger cleanup every few months.

    4. How do I decide what to keep and what to throw away?

    Keep items you use regularly, need, or genuinely enjoy. Donate, sell, or throw away things that no longer serve a purpose.

    5. How can I declutter my home without feeling overwhelmed?

    Work on one room or small area at a time instead of tackling everything at once. Set a short daily goal and take breaks when needed.

  • Decluttering With Feng Shui: Simple Changes for a Calmer Home

    Decluttering With Feng Shui: Simple Changes for a Calmer Home

    A cluttered home can make it harder to relax, focus, and enjoy your surroundings. Feng shui offers a simple way to arrange your living space by focusing on balance, open pathways, and thoughtful placement of belongings.

    You do not need to buy new furniture or make major changes to follow its principles. Small steps, such as clearing crowded surfaces and organizing your bedroom, can help make your home feel more peaceful and comfortable.

    What Is Feng Shui, and How Does It Relate to Decluttering?

    Feng shui is a traditional Chinese practice that focuses on arranging spaces to support balance and harmony. It considers how furniture, objects, light, and room layouts affect the overall feel of a space.

    One important concept in feng shui is chi, often described as the energy that flows through a space. According to feng shui principles, clutter can interfere with this flow and make a room feel crowded or unbalanced.

    Decluttering helps create open space and makes it easier to move around your home. It also reduces the number of items you need to clean and organize. Although feng shui is a traditional practice rather than a scientifically proven method for improving well-being, its focus on clear spaces and thoughtful arrangements can help create a more comfortable home.

    12 Simple Ways to Declutter Your Home With Feng Shui

    You do not need to change your entire home at once. Start with a few small areas and work your way through each room.

    1. Start With the Main Entrance

    The main entrance is important in feng shui because it is traditionally seen as the place where energy enters the home. Keeping it clear and welcoming is a simple way to apply these principles.

    Remove shoes, bags, packages, and other items that collect near the door. Keep only the things you regularly use in this area, and find a suitable place for everything else.

    Make sure the door can open fully without hitting anything. A clean entrance and clear pathway make it easier to enter and leave your home without dealing with unnecessary clutter.

    2. Clear Clutter From Your Living Room

    The living room is often where family members relax and spend time together. Too many objects can make this space feel crowded and leave less room for comfortable movement.

    Remove old magazines, unused decorations, and items that belong in other rooms. Clear coffee tables and side tables so you have enough space for everyday activities.

    Check your furniture arrangement, too. Keep walking paths open and make sure chairs and sofas are easy to access. You can still display your favorite decorations, but leaving some surfaces empty helps the room feel less busy.

    3. Make Your Bedroom a Restful Space

    Feng shui places particular importance on the bedroom because it is a place for rest. A tidy bedroom can also make your daily routine easier by giving you fewer things to clean and organize.

    Start with your bedside tables, dresser, and floor. Remove dirty laundry, unused items, and objects that do not belong in the bedroom. Keep useful items, such as a book or lamp, within easy reach.

    If possible, keep the space under your bed clear instead of using it to store random belongings. If you need the extra storage, keep items neatly organized rather than allowing them to pile up.

    4. Keep Your Kitchen Counters Clear

    The kitchen can quickly become cluttered with appliances, food packages, dishes, and small household items. Clearing these surfaces makes cooking easier and helps the room feel more organized.

    Put away appliances you rarely use if you have suitable storage space. Remove expired food from cupboards and the refrigerator, and return ingredients to their proper places after cooking.

    Try to keep the sink and main food preparation area clear. You do not have to empty every counter, but leaving enough open space makes everyday tasks easier.

    5. Organize Your Bathroom

    Bathrooms often contain small items that take up space without serving a useful purpose. Expired skincare products, empty bottles, and unused toiletries can quickly fill drawers and counters.

    Go through your bathroom supplies and remove anything you no longer use. Group similar items together, such as hair products, skincare products, and cleaning supplies.

    Use drawers or small baskets to keep the remaining items organized. Keep frequently used products easy to reach and leave some counter space open. This makes the bathroom easier to clean and gives it a less crowded appearance.

    6. Remove Items You No Longer Need

    One simple way to apply feng shui principles is to reduce unnecessary belongings. Items you no longer use can take up valuable space and make it harder to keep rooms organized.

    Choose one category at a time, such as clothing, books, kitchen tools, or decorations. Decide which items you use regularly, which have personal value, and which you can let go of.

    Donate useful items that are still in good condition, recycle what you can, and dispose of anything that cannot be reused. You do not need to get rid of every sentimental object. The goal is to keep things that serve a purpose or matter to you without allowing them to overwhelm your space.

    7. Keep Walkways and Doorways Open

    Clear pathways are important in feng shui because they allow people to move easily through a room. Open walkways also make a home safer and more comfortable to use.

    Move boxes, laundry baskets, and other objects away from doorways and narrow passages. Check whether furniture blocks access to windows, closets, or other parts of the room.

    If a room feels crowded, consider moving a piece of furniture or removing something you rarely use. You may not need to buy anything new. A small change in furniture placement can make a room feel more open.

    8. Let Natural Light Into Your Home

    Natural light can make a room feel brighter and more inviting. Feng shui also emphasizes light and the overall feel of a space, so keeping windows clear is a useful place to start.

    Remove unnecessary items from windowsills and move furniture that blocks sunlight when practical. Open curtains or blinds during the day when privacy and weather conditions allow.

    If a room receives little natural light, use suitable lamps to brighten darker areas. You can also choose lighter curtains that allow more daylight into the room.

    9. Use Mirrors Thoughtfully

    Mirrors are used in feng shui to reflect light and create a sense of space. Their placement matters because a mirror can also reflect clutter and make a busy area feel even more crowded.

    Place mirrors where they can reflect natural light or a pleasant part of the room. For example, a mirror opposite a window may help spread light throughout the space.

    Avoid placing mirrors where they reflect piles of laundry or crowded shelves. You do not need several mirrors in every room. One well-placed mirror can be enough.

    10. Choose Decorations With Care

    Decorations make a home feel personal, but too many objects on shelves, tables, and walls can create visual clutter. Feng shui encourages thoughtful arrangements that support a balanced feel.

    Choose a few items you enjoy looking at, such as family photographs, artwork, or meaningful keepsakes. Give these objects enough space so they do not blend into a crowded display.

    You can rotate decorations throughout the year instead of displaying everything at once. Store the items you are not using and bring them out when you want a change.

    11. Bring in Plants and Natural Elements

    Feng shui often uses natural elements to create a sense of balance. Plants, wood, stone, and natural fabrics can add warmth and interest to a room.

    If you enjoy plants, place one or two in suitable areas where they can receive the light and care they need. Remove dead leaves and avoid keeping unhealthy plants simply for decoration.

    You can also use wooden furniture or natural fabric cushions to bring a natural feel to your home. You do not need to buy new items if you already have suitable pieces.

    Keep these additions limited. The aim is to make the room feel comfortable without replacing one form of clutter with another.

    12. Create a Simple Daily Reset Routine

    Decluttering becomes easier when you prevent small messes from building up. A short daily routine can help you maintain the changes you have made.

    Spend five to ten minutes putting things back in their places. Return books to shelves, place dirty clothes in a laundry basket, clear kitchen counters, and remove misplaced items from tables.

    Choose a time that fits your routine, such as before bed or after dinner. You can also focus on one room each day if managing the whole house feels like too much work.

    How to Declutter Using the Feng Shui Bagua Map

    The bagua map is a feng shui tool that connects different areas of a home with aspects of life. Depending on the method used, these areas may relate to wealth, relationships, health, career, and knowledge.

    Some people use the map to decide which parts of their homes to organize first. For example, you might begin with your bedroom to create a more restful space or clear your desk to make working easier.

    Bagua methods can differ, so applying the map may require learning the specific approach you want to follow. Beginners do not need to follow every rule to benefit from decluttering.

    Start with practical changes that make sense for your home. Clear crowded surfaces, improve storage, and create open walking paths. You can explore the bagua map later if you want to learn more about traditional feng shui.

    Common Feng Shui Decluttering Mistakes to Avoid

    Avoid these common mistakes when decluttering your home with feng shui.

    • Doing too much at once: Start with one room or small area to avoid feeling overwhelmed.
    • Keeping items out of guilt: Let go of things you no longer need while keeping meaningful belongings.
    • Buying too many organizers: Reduce clutter before buying storage boxes or baskets.
    • Following rules too strictly: Focus on what makes your home comfortable and practical.
    • Expecting instant results: Make small, lasting changes instead of trying to perfect every room at once.

    Final Words

    Decluttering with feng shui can help make your home feel more open, balanced, and comfortable. Clearing entrances, organizing bedrooms, letting in natural light, and keeping walkways open are practical changes that cost little or nothing.

    Start with one small area and build from there. By removing unnecessary items and developing simple daily habits, you can create a home that better supports your comfort and everyday needs.

    People Also Ask

    1. How Does Feng Shui Help With Decluttering?

    Feng shui encourages clear spaces, open pathways, and thoughtful furniture placement. These changes can make your home feel more organized and comfortable.

    2. What Should You Declutter First in Feng Shui?

    Start with your main entrance because feng shui considers it an important entry point for energy. Remove shoes, bags, and other items that block the doorway.

    3. What Should You Remove From Your Bedroom According to Feng Shui?

    Remove unnecessary items, dirty laundry, and clutter from bedside tables and floors. Keep the space tidy to create a more restful environment.

    4. Does Feng Shui Require You to Get Rid of Everything?

    No, feng shui does not require you to remove all your belongings. Keep useful and meaningful items while clearing things you no longer need.

    5. How Often Should You Declutter Your Home With Feng Shui?

    Do small decluttering tasks daily and review crowded areas every few weeks. Regular upkeep helps prevent clutter from building up again.

  • Decluttering Made Easy: 15 Ways to Clear Clutter Without the Stress

    Decluttering Made Easy: 15 Ways to Clear Clutter Without the Stress

    Clutter can make your home feel messy and leave you unsure where to start cleaning. From crowded kitchen counters to overflowing closets, too many belongings can make everyday tasks harder.

    However, you do not need to clear everything in one day to make a difference. Small steps can help you create more space without feeling overwhelmed. With a few simple habits, you can remove unwanted items, organize the things you use, and keep your home tidy with less effort.

    1. Start With One Small Area

    Looking at an entire messy room can make decluttering feel like a huge task. Instead of trying to clean everything at once, choose one small area, such as a drawer, shelf, or bedside table.

    Remove the items from that area and decide what to keep, donate, or throw away. Once you finish, move on to another small section. This approach helps you see progress without creating a bigger mess throughout the house.

    2. Set a Short Timer

    You do not need to spend hours decluttering to make progress. Set a timer for 10 to 15 minutes and focus on one task until the time is up.

    For example, you could spend 10 minutes sorting bathroom products or 15 minutes clearing a kitchen drawer. Short sessions are easier to fit into a busy day and can help you avoid getting tired.

    If you still have energy after the timer ends, you can continue. Otherwise, stop and return to the task another day.

    3. Declutter One Item at a Time

    Trying to make decisions about dozens of belongings at once can become tiring. Instead, pick up one item at a time and decide whether you still need it.

    Ask yourself a few simple questions. Do you use it regularly? Is it in good condition? Does it serve a purpose in your home? If you no longer need it, consider donating, selling, or discarding it.

    This method keeps the process simple and helps you avoid moving items from one pile to another without making decisions.

    4. Use the Four-Box Method

    The four-box method gives you a simple way to sort belongings while decluttering. Take four boxes, baskets, or bags and label them:

    • Keep: Items you use or want to keep.
    • Donate: Useful items that someone else could use.
    • Sell: Items in good condition that have resale value.
    • Discard: Broken, damaged, or unusable items that cannot be repaired or reused.

    As you go through a space, place each item in the appropriate box. This keeps your decisions organized and prevents unwanted belongings from getting mixed up with things you plan to keep.

    Once you finish, put away the items you are keeping and deal with the other boxes promptly.

    5. Start With Easy Decisions

    Some belongings are easy to remove, while others can take much longer to sort through. Starting with difficult decisions can make the entire process feel stressful.

    Begin with things you clearly no longer need, such as expired products, empty packaging, broken household items, and old papers with no useful information.

    Leave sentimental belongings, gifts, and items with personal meaning for later. Once you have cleared some space and built momentum, you may find it easier to decide what to do with them.

    6. Follow the One-In, One-Out Rule

    The one-in, one-out rule helps prevent clutter from building up again. Whenever you bring a new item into your home, remove an existing item of the same type.

    For example, if you buy a new shirt, consider donating one you no longer wear. If you purchase a new kitchen utensil, check whether you already have one that can be removed.

    You do not have to apply this rule to every item you own. It works especially well for clothes, shoes, kitchenware, books, and other belongings you tend to collect over time.

    7. Clear Flat Surfaces First

    Tables, countertops, desks, and dressers can quickly become cluttered because they provide convenient places to leave things. Clearing these surfaces can make a room look tidier without requiring a complete reorganization.

    Start by removing items that do not belong there. Put away papers, return dishes to the kitchen, and move personal belongings to their proper places.

    Keep only the items you use regularly or want to display. You can leave a few decorative pieces on a table or shelf, but avoid filling every available space.

    8. Declutter Your Clothes in Small Batches

    Clothing can take up a lot of space, especially when closets contain items you rarely wear. However, sorting through every piece of clothing at once can be tiring.

    Start with one category, such as shirts, trousers, shoes, or jackets. Keep the items you wear and feel comfortable in. Set aside anything that no longer fits, is damaged beyond repair, or has not been useful for a long time.

    You can also create a separate pile for clothes you are unsure about. Revisit those items later instead of forcing yourself to make every decision immediately.

    Once you finish, arrange the remaining clothes so they are easy to see and reach.

    9. Get Rid of Duplicate Items

    It is easy to collect multiple versions of the same household item. You might have several kitchen utensils, water bottles, storage containers, or cleaning tools even though you only use a few.

    Check these items and decide how many you actually need. Keep enough to suit your household and daily routine, then donate useful extras or discard damaged ones.

    You do not have to remove every duplicate. Extra plates, towels, or utensils may be useful if you have a large family or regularly host guests. The goal is to remove unnecessary items, not make your home less practical.

    10. Give Every Item a Home

    Clutter often builds up when belongings do not have a specific place to go. Without a clear storage spot, items end up on tables, chairs, countertops, and other available surfaces.

    Assign a home to everyday belongings. Keep keys near the entrance, store cleaning products in one designated area, and place chargers where you usually use them.

    Choose storage locations that make sense for your routine. Items you use frequently should be easy to reach, while things you rarely need can go on higher shelves or in less accessible storage spaces.

    When everything has a place, tidying up becomes easier because you know where each item belongs.

    11. Use a Simple Keep-or-Remove Checklist

    If you struggle to decide what to do with certain belongings, use a short checklist to guide your choices.

    Ask yourself:

    • Have I used this item recently?
    • Do I need it for a specific purpose?
    • Is it in good condition?
    • Do I have enough space to store it?
    • Would I choose to keep it if I were organizing my home from scratch?

    You do not need to answer every question for every item. Use the ones that help you make a clear decision.

    If something is useful, meaningful, or necessary, keeping it makes sense. If you have no real use for it and it takes up valuable space, consider letting it go.

    12. Deal With Paper Clutter Immediately

    Mail, receipts, bills, instruction manuals, and old documents can pile up quickly. If you leave them in random places, they can make desks, drawers, and countertops look messy.

    Sort papers into three basic groups: keep, act on, and discard. File important documents, handle bills or forms that need attention, and recycle papers you no longer need.

    Be careful with documents containing personal or financial information. Shred them before disposal when appropriate.

    You can also reduce future clutter by switching to digital bills and statements when convenient. Keep essential physical documents in labeled folders so you can find them when needed.

    13. Declutter Sentimental Items Gradually

    Getting rid of sentimental belongings can be harder than removing ordinary household items. Old photographs, gifts, letters, and souvenirs may remind you of important people or experiences.

    You do not need to discard these items simply because they take up space. Instead, decide which belongings are most meaningful to you and how much room you can reasonably give them.

    Start with a small collection rather than opening every box of keepsakes. You could keep your favorite photographs in an album or store special letters in one box.

    For items you want to remember but do not need to keep physically, consider taking photographs of them. This gives you a way to revisit the memories without storing every object.

    14. Donate or Remove Unwanted Items Promptly

    After sorting your belongings, do not leave unwanted items sitting around for weeks. Donation bags and boxes can become another source of clutter if you forget to deal with them.

    Choose a specific day to take donations to a local charity or arrange a pickup if that service is available. You can also offer useful items to friends or family members who need them.

    Check that donated belongings are clean and in usable condition. Recycle or dispose of damaged items responsibly when possible.

    If you plan to sell something, give yourself a reasonable deadline. If it does not sell, consider another option rather than letting it occupy space indefinitely.

    15. Create a Simple Daily Reset Routine

    Decluttering becomes easier when you spend a little time maintaining the spaces you have already cleared. A short daily reset can prevent small messes from turning into larger tasks.

    Spend five to ten minutes putting things back where they belong. Return dishes to the kitchen, fold blankets, clear frequently used surfaces, and put away items left out during the day.

    Focus on the areas that become messy most often. You might need to reset your living room every evening but only organize a guest room occasionally.

    Keep the routine simple enough to follow regularly. You do not need to make your home look perfect every day. The aim is to keep clutter under control without spending too much time cleaning.

    Final Words

    Decluttering does not have to be a stressful or time-consuming task. Starting with small areas, setting short timers, and making simple decisions can help you clear unwanted belongings at a comfortable pace.

    Once you have more space, a few daily habits can prevent clutter from returning. You do not need to finish your entire home in one day. Start with one drawer or shelf, build a routine that works for you, and make progress one step at a time.

    Frequently Asked Questions (FAQs):

    1. Where should I start when decluttering my home?

    Start with a small area, such as a drawer, shelf, or countertop. Finish that space before moving on to another area.

    2. How can I declutter without feeling overwhelmed?

    Break the task into small steps and work for 10 to 15 minutes at a time. Focus on making steady progress instead of finishing everything in one day.

    3. What should I do with items I no longer need?

    Donate useful items, sell belongings in good condition, and discard things that cannot be reused. Try to remove unwanted items from your home promptly.

    4. How often should I declutter my home?

    Spend a few minutes each day putting things away and removing unnecessary items. Review larger areas every few weeks or whenever clutter starts to build up.

    5. How do I keep my home clutter-free?

    Give every item a designated place and return it there after use. Also, avoid bringing home new items you do not need.